Misita Designs has had some really nice paper-and-ink attention this year. It’s appeared in two different local publications, namely “Our Louisiana” magazine and “Natchez the Magazine.” In the first, Misita Designs won the magazine’s Sonata Award in the Architectural Elements category. “Our Louisiana” accepts submissions from all over their state, then selects winners in several different design categories. This recognition was very gratifying, especially considering this category was not limited to metalwork, but included work in all types of materials and … Continue reading
Entry 13 - Great Press!
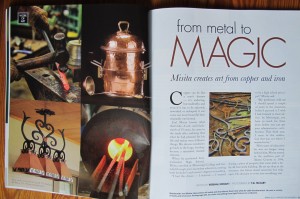
Posted On: January 12, 2016
Entry 12 - Solid Copper Candlesticks
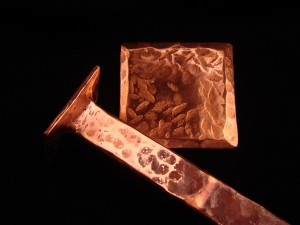
Posted On: August 28, 2015
Joel…in the billiard room…with the candlestick… He’s done it again! Not murder, though, just extraordinary craftsmanship. Joel made these beautiful copper candlesticks for a man in Switzerland. The client had chosen a specific design, and Joel replicated it. He used solid copper and hammered them by hand. They were quite heavy! Built to please, built to last (and maybe even for use in a life-sized game of “Clue”). These copper candlesticks had a gorgeous patina that Joel achieved through a process of blow-torch heating. … Continue reading
Entry 11 - Custom Copper Shutters
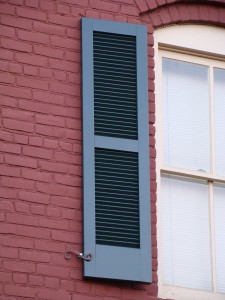
Posted On: August 24, 2015
These copper shutters are on a commercial building in downtown Natchez. It’s a relatively large, vintage, brick building, painted red without much adornment. Local preservation standards dictate that the shutters be painted “Natchez Green,” as its known around here. The contrasting colors and textures of the copper shutters and the brick give this understated building a really sharp look. I also did the building’s rear copper awning and courtyard copper lanterns, and would like to think that it benefits from the continuity … Continue reading
Entry 10 - Custom Vent Hoods, Copper Vent Hoods
Posted On: June 7, 2015
Writing a blog entry usually starts with telling a story of some sort or another. This time, though, the work will speak for itself. Custom copper vent hoods are phenomenal conversation pieces, and seem to satisfy my clients like nothing else does. People who commission me to create custom vent hoods, or range hoods as they’re also called, love their homes, live in their kitchens, and sometimes even like to cook. Here’s a collection of some that I’ve done. If they inspire … Continue reading
Entry 9 - Copper Cuff Bracelets
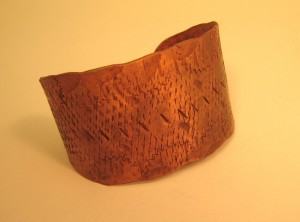
Posted On: April 6, 2015
The copper bracelets. Another part of our story. My wife and I had just met, and had just begun our long-shot, long-distance, cross-cultural relationship. She was in Chicago, I was in Mississippi (now you know what I mean by cross-cultural). She was planning a quick trip to Minneapolis to attend the wedding of one of her dearest friends, and got the idea that she’d like to have me along. So even though she had already RSVP’d solo for the wedding, … Continue reading
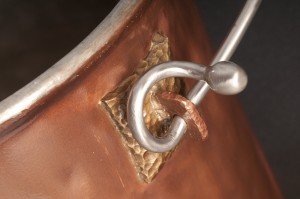
Entry 8 - Copper Stock Pot
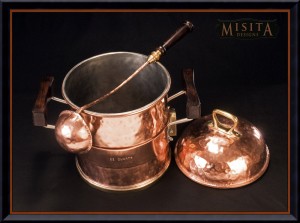
Posted On: April 1, 2015
Last fall, I made a custom iron pot rack for a client in St. Louis (that’s another day’s entry). He told me about a special, hand-made, copper stockpot he wanted replicated, but said he wasn’t ready to go ahead with it at the time. Several months after installing the pot rack, I got a call from his fiancée…he had also told her about the pot, and she commissioned me to make it for him as a wedding gift. Their wedding … Continue reading
Entry 7 - Mahogany and Copper Urn
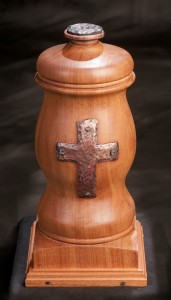
Posted On: March 8, 2015
Two weeks ago I made a casket for a friend. Last week I made an urn…kind of makes me wonder if someone’s trying to tell me something! Anyway, I want to write about this handmade urn because it was a very personal project. I grew up with a girl named Stephanie. She and her parents had long since moved out of state, but we’ve stayed in touch, and have visited when we’ve had the opportunity to do so. She called me … Continue reading
Entry 6 - Hammered Copper Urinal
Posted On: February 8, 2015
Everybody should have a pot like this to p*** in! I got a call a while back from an entrepreneur in Nova Scotia, Canada. He was getting ready to open a new establishment, a British-style pub, and he wanted all the amenities, even the bathroom fixtures, to be consistent with the theme. He commissioned me to make a copper urinal for his men’s room. Now when people ask me, “So what do you make, anyway?” I tell them about this project … Continue reading
Entry 5 - Cypress and Copper Commercial Sign
Posted On:
One of my recent projects was a departure from my usual commissions. I typically create architectural features or other functional art. I guess this one could fall in the “functional art” category…I made a commercial sign for a local trucking company. I wouldn’t imagine that there are many trucking companies interested in a custom-made sign. But there’s at least one that is, and fortunately for me, it is headquartered right here in Natchez, Mississippi. So I was pleasantly surprised, and … Continue reading
Entry 4 - Custom Music Room Handrails
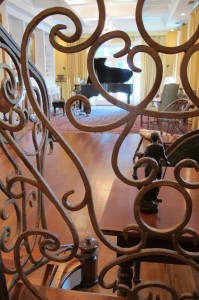
Posted On: October 16, 2014
Both are passionate about music…she’s an accomplished pianist. They also love a beautiful and historic, old, southern house. This one’s been in his family for generations. The homeowners, a married couple, became my clients when they undertook some major renovations and made significant additions to their home recently. Their project revolved around the creation of a music room carefully designed for performance. The performance space is comprised of the music room on one level, and a sitting area on an upper … Continue reading
Entry 3 - Copper Rose Ring Box
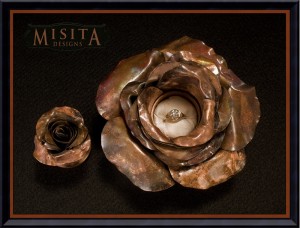
Posted On: July 19, 2014
Well, there’s a story to be told here…this is the copper rose box I made for my wife’s engagement ring. I gave it (with the ring) to her on a fine and snowy Thanksgiving morning when we were visiting her family in Connecticut. We were on our way out to run an errand, and I told her I wanted to show her a flower that was growing through the snow back behind the old red barn. It was a magnificent morning…brilliant sunlight and … Continue reading
Entry 2 - Staircase Handrails
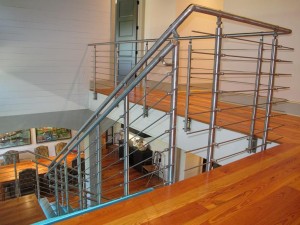
Posted On: May 27, 2014
Ever heard of the Tchefuncte River? That’s pronounced “chuh-funk-tuh,” for those of you, like my wife, who are not from around these parts. The Tchefuncte passes through Tangipahoa, Washington, and St. Tammany Parishes before emptying into Lake Ponchartrain, across from New Orleans. It hits Madisonville about two miles north of the lake. Madisonville is one of the prettiest little river communities we have ever seen. Quaint, historic, marine…a great spot for enjoying a meal outside or an evening stroll. Through … Continue reading
Entry 1 - Custom Hand Made Wrought Iron Pot Rack

Posted On: April 1, 2014
I installed a custom, iron pot rack for a homeowner in St. Louis, Missouri. He and his fiancée were in the midst of remodeling their home. Their style was very traditional, and they needed a piece in their kitchen that would anchor the room as well as provide a needed function…getting all the pots safely but accessibly stowed! My client and I spent hours on the phone discussing the design for this rack. He had some particular specs it needed … Continue reading